|
Part 2:
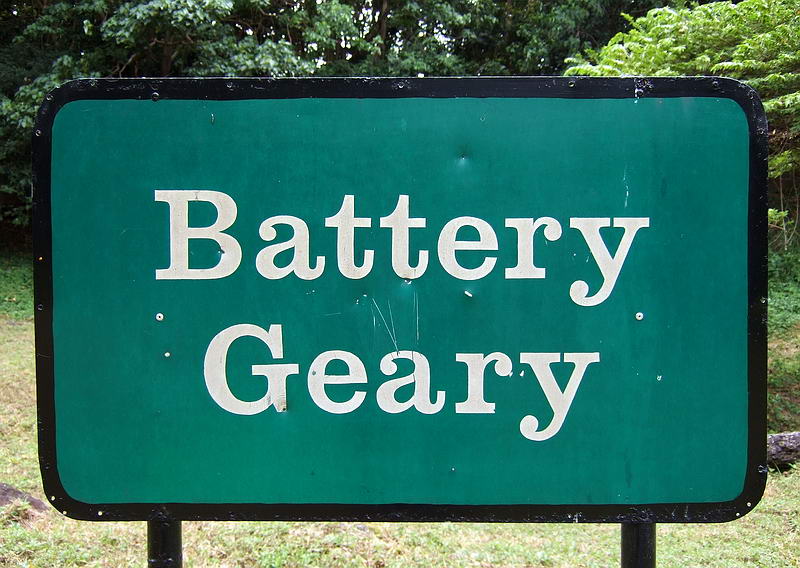
Vintage photos of Battery Geary
Armaments of Battery Geary consisted of eight 12-inch mortars mounted in a
two-pit arrangement of four mortars each. Facing the enemy, Pit 'A' was on
the right and Pit 'B' was on the left. On each side of the mortar Pits were
three magazines. Pit 'A' mortars were model 1898M1 and Pit 'B' mortars were
the more modern model M1908. The field of fire was 360-degrees.
Heavy Japanese shelling from Bataan began to wear away at the concrete roof
of the magazines. On May 2, 1942, a 240mm howitzer shell penetrated the
center magazine detonating 1,600 62 pound powder charges. The resulting
explosion shook the island and threw large chunks of concrete and debris up
to a mile away.
To my knowledge there are no pre-war photos showing the whole battery. Pit
view photos do exist and I will include a few in this report.
One rendering from
an Osprey Publishing book entitled 'American Defenses Of Corregidor & Manila
Bay 1898-1945' is quite interesting in that it gives us a good idea of the
overall configuration of Battery Geary. The book itself is packed with
photos and maps which allows for a good understanding of Manila Bay forts. I
would recommend it.
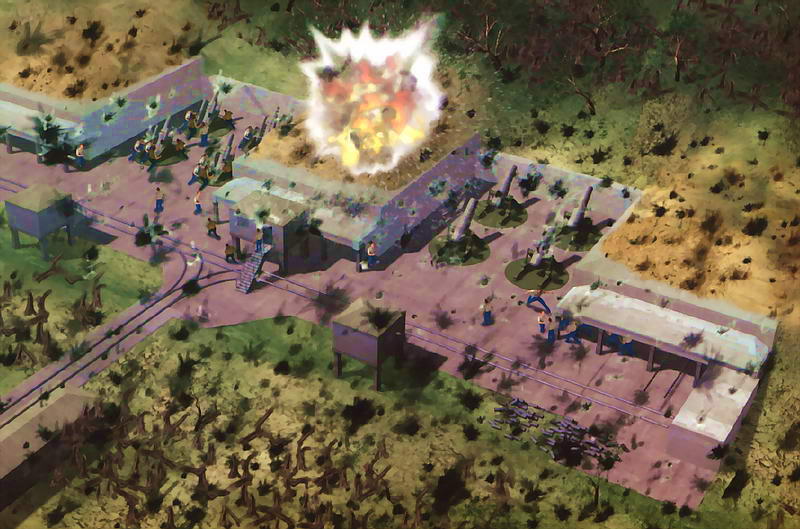
Overall view of an undamaged Battery Geary. (American Defenses Of Corregidor
& Manila Bay 1898-1945).

This 1945 parachute drop photo shows us what Battery Geary looked like
almost three years after the explosion.

Right side view of the M1898M1 mortar. This model was placed in Pit 'A'.
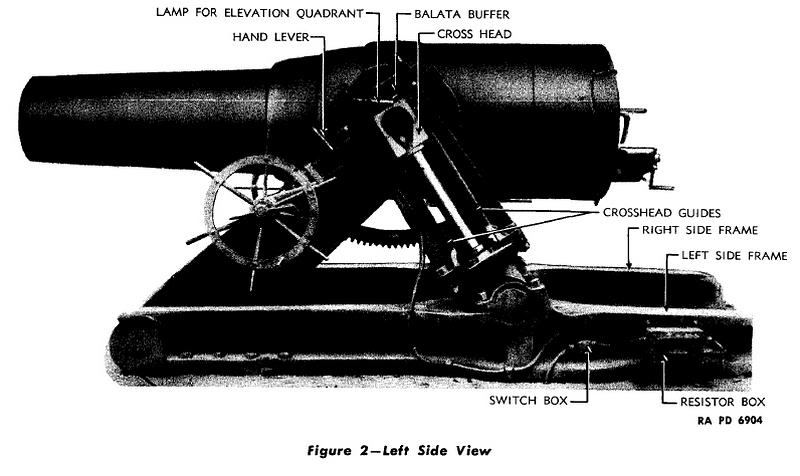
Left side view of the M1898M1 mortar.
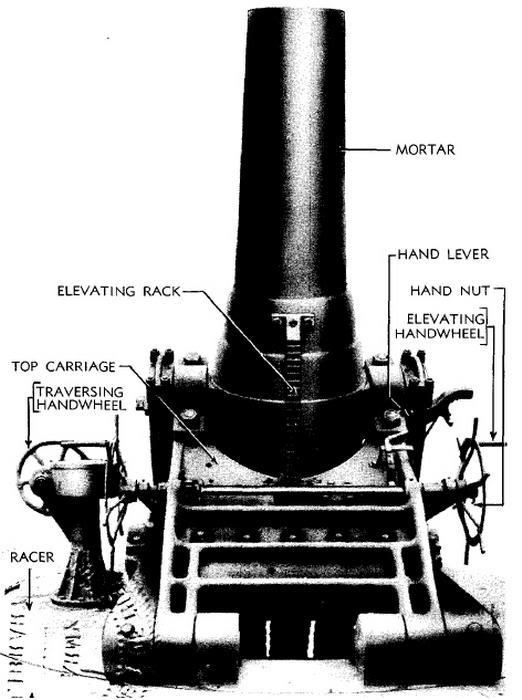
Front view of the M1898M1 mortar.

This Pit 'A' view gives me the impression that it is still under
construction.
The trolley line at the top of the photo continues to the right towards
Battery Crockett.
Another Pit 'A' view. The trolley line has been extended in this direction
also.
(Tony Feredo Collection)
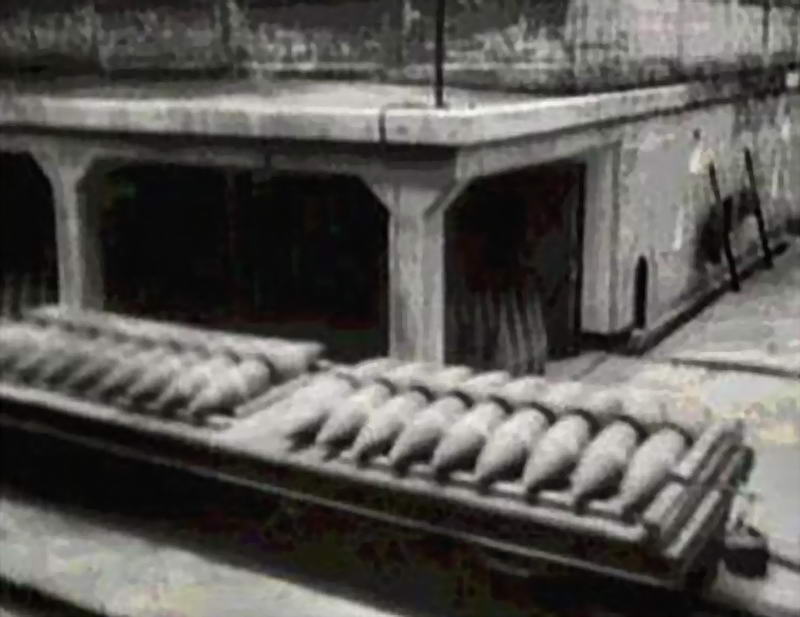
Screen capture of a trolley load of shells arriving at the battery.
(Courtesy Batteryboy)
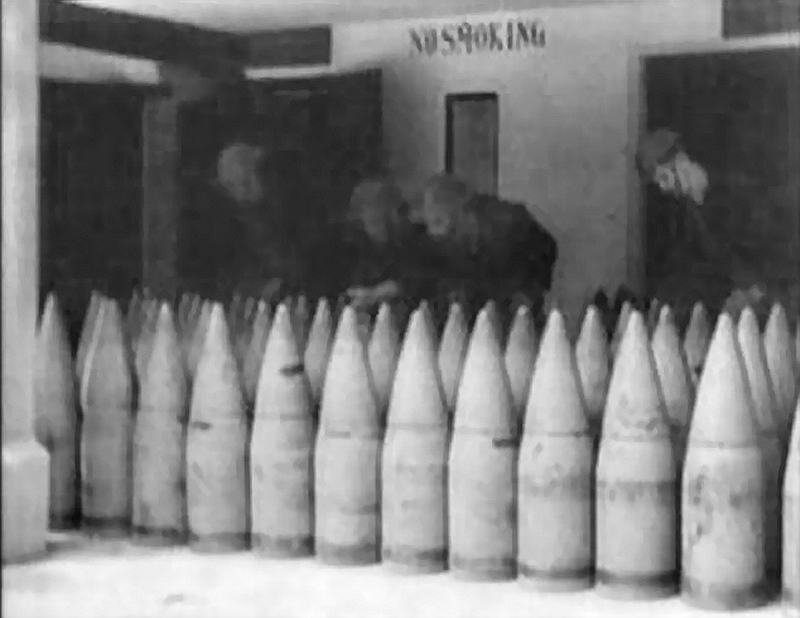
(Screen capture, Courtesy Batteryboy.)
The 700 lb. Deck Piercing shell seen in the above screen captures.

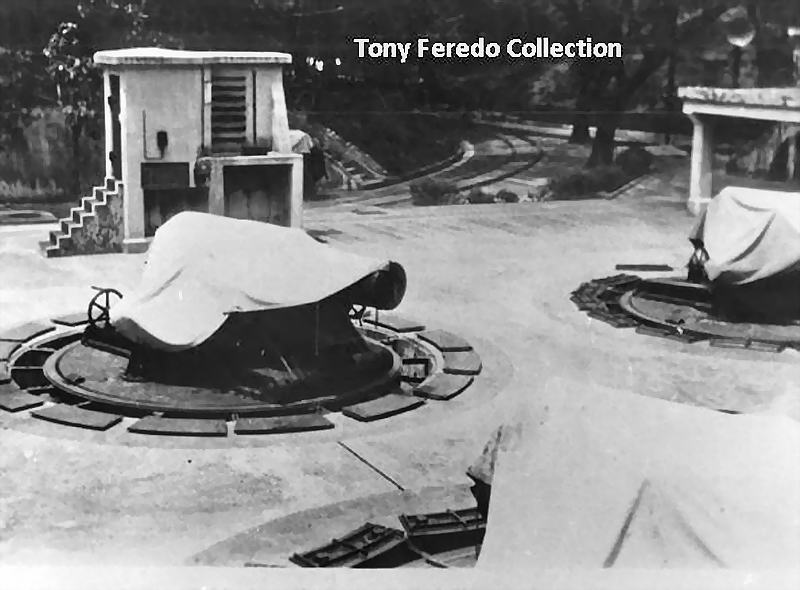
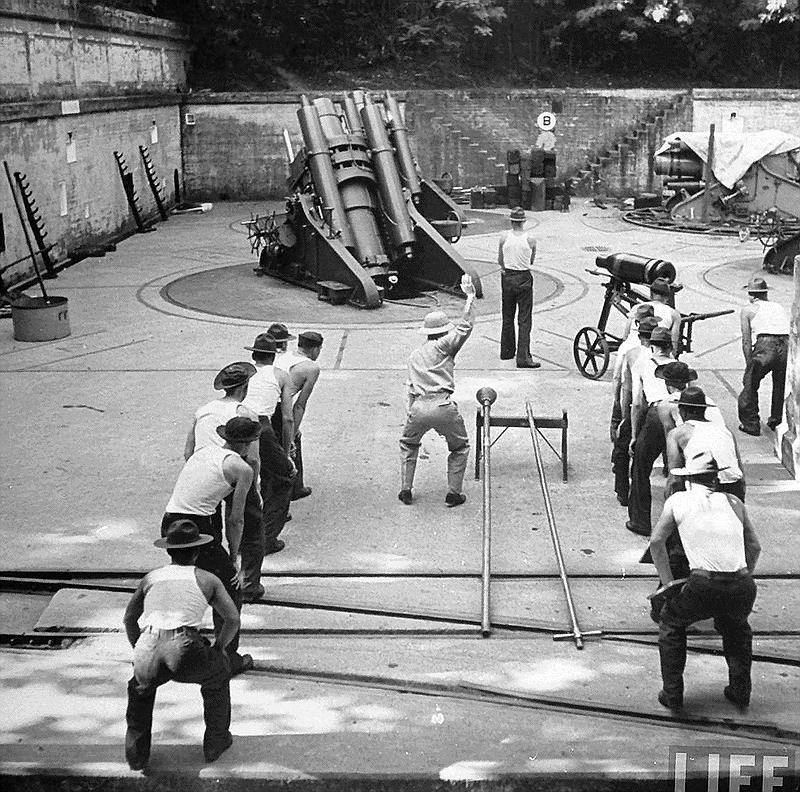
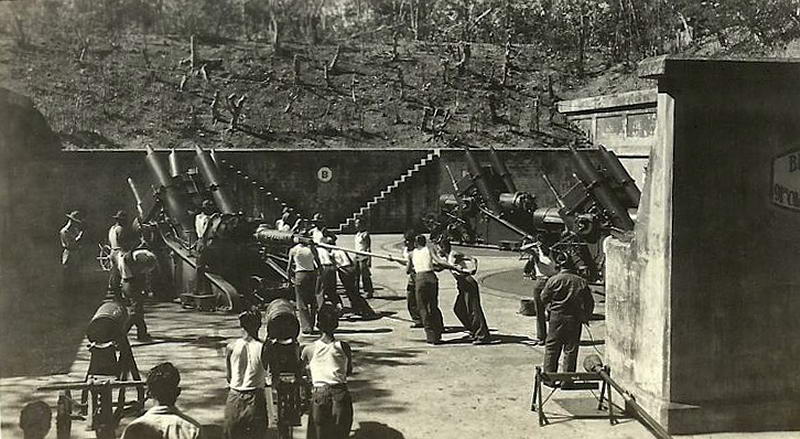
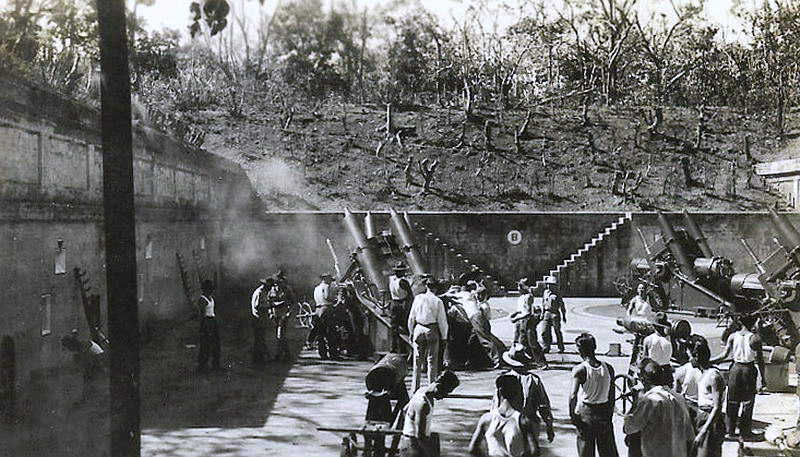
Pit 'B' drills.

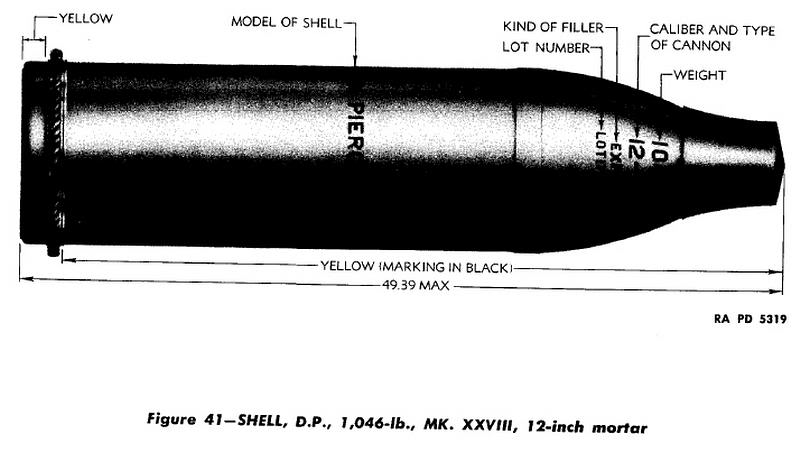
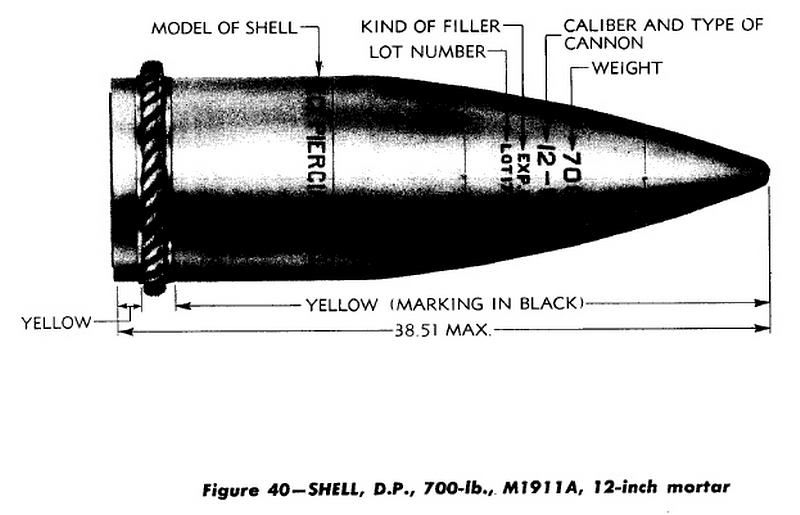
In the above photos you can see the 1,046 lb. Deck Piercing shell.
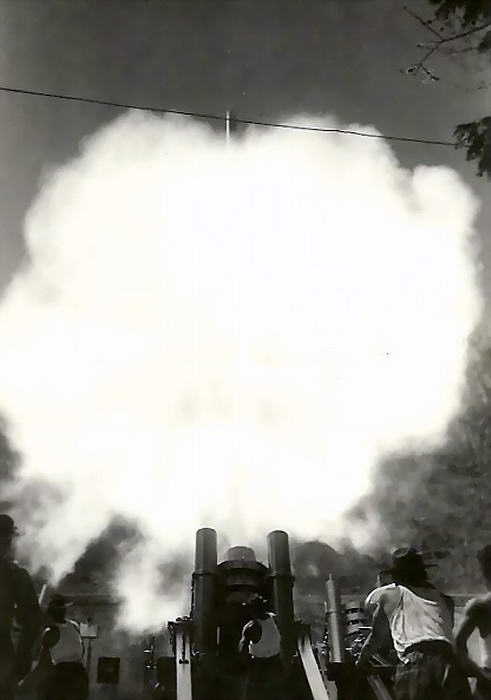
A lucky shot for the photographer.
The tip of a Pit 'B' mortar shell can be seen as it emerges from the smoke.

View of Pit 'B' taken from the front parapet.

The destruction around Battery Geary as seen in this 1942 Japanese photo.
A Pit 'A' mortar can be seen pointing upwards at mid right.
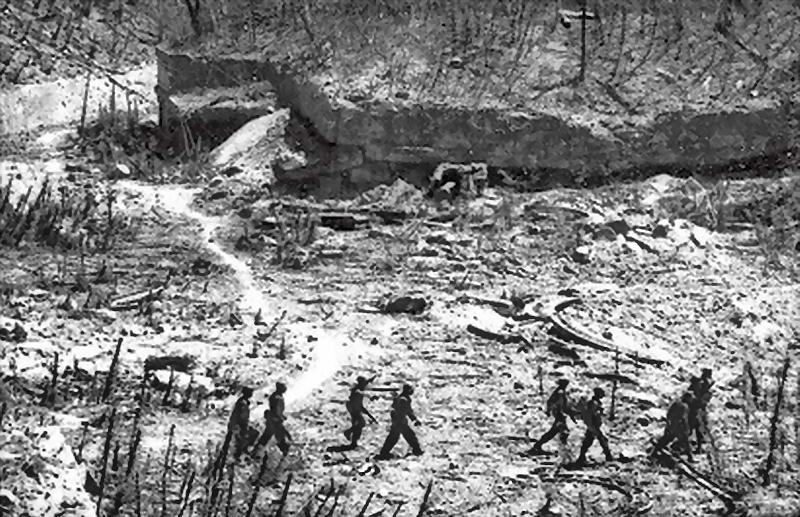
A US patrol walks through the battery on March 6th, 1945. Magazine #3 is in
the background.
The wall beside the road seen at upper left leads to Battery Crockett.
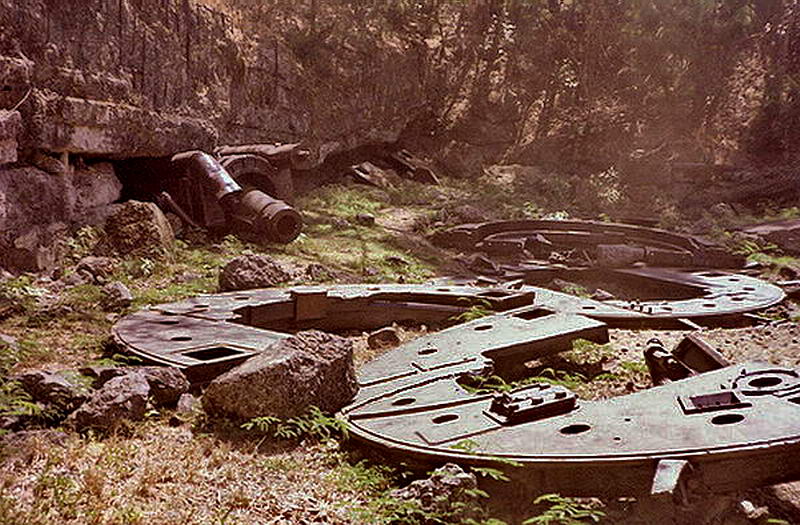
As for the eight mortars of Battery Geary, six are still
onsite today. Four are in the battery, one was blown across the road and one
sits on top a nearby ridge.
It is said that one mortar was thrown up to the golf course.
Supposedly this mortar plus one more were to be shipped to Japan for
scrapping. Of these two, one broke through the bottom of a barge and sank in
Manila Bay. The second one made it as far as the Pasig River in Manila.
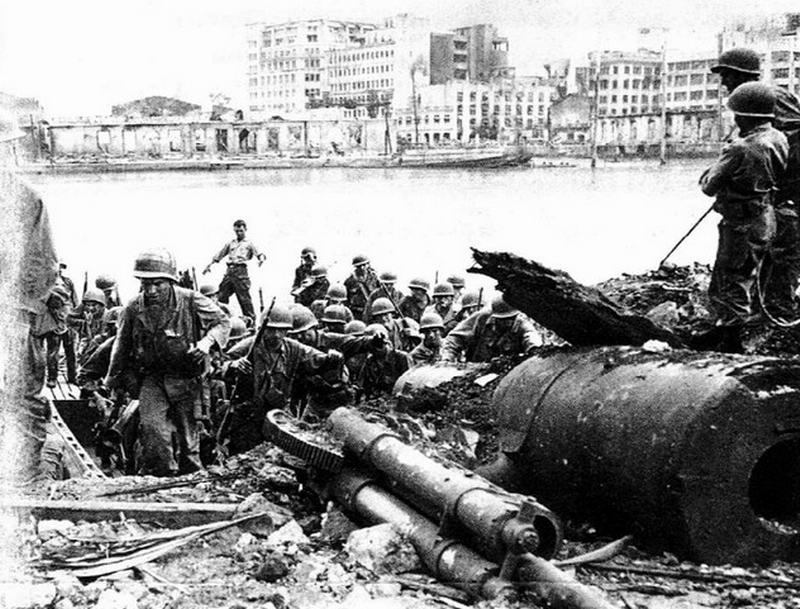
1945 photo of a 12-inch mortar lying on a bank of the Pasig River during the
Battle for Manila.
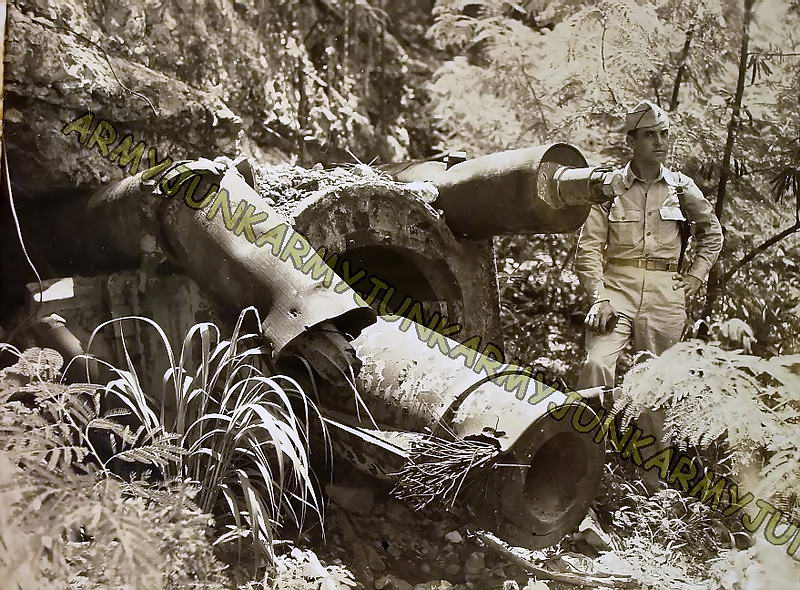
1945 post-war photo of a Pit 'B' mortar. Today, this is one of two mortars
that support the roof of Magazine #3.
(Photo courtesy Armyjunk)
1981 photo of the same mortar.
Most text you read
about Battery Geary will say that this battery was totally destroyed by the
magazine's explosion. This gives people the impression that there is not
much left to see today. The reality is that quite a bit remains and I find
it more interesting than if it was fully intact.
Part 3 coming soon.
GO TO PART 3
|